How to Grow Onions Organically in Your Backyard
Onions are a kitchen staple and growing them yourself without chemicals feels like a small victory over the grocery store. Plus, backyard onions taste sharper, sweeter, and somehow more yours. This guide walks you through every step to grow lush, organic onions at home, using methods that work with nature, not against it. No jargon, no fluff, dirt-under-your-nails advice.
Why Grow Onions Organically?
Going organic means no synthetic fertilizers or pesticides, which is better for your soil, your food, and the critters sharing your backyard. Chemical-free onions pack more flavor since they grow at nature’s pace, pulling nutrients straight from the earth. You’re also cutting down on plastic packaging and long-haul trucking from industrial farms. It’s a quiet way to stick it to the system while harvesting bulbs you can slice into tonight’s stir-fry.
Choosing the Right Onion Varieties for Your Backyard
Not all onions are created equal. Pick ones that match your climate and cravings. Long-day onions (like Walla Walla or Redwing) thrive in northern areas with 14-16 hours of summer daylight, forming big bulbs. Short-day types (such as Texas Sweet or Vidalia) are well-suited for southern yards, as they produce a larger crop with less sunlight. Want a mild bite? Go for sweet varieties. Need something to store through winter? Try pungent yellow onions like Copra.
Check seed catalogs or local nurseries for organic options. Baker Creek or Southern Exposure Seed Exchange are solid bets. If you’re unsure what grows best in your area, ask a neighbor with a thriving garden for advice. They’ll know.
Preparing Your Backyard Soil for Organic Onions
Onions are picky about soil. They want it loose, fertile, and well-draining, with no heavy clay or soggy patches. Start by digging a bed about a foot deep. Mix in a generous layer of homemade compost or well-rotted manure (cow or horse works great). This feeds the soil without the burning of chemical fertilizers. If your dirt’s lean, toss in some crushed eggshells for calcium or wood ash for potassium—don’t go overboard; a handful per square yard is plenty.
Test your soil’s pH if you can. Onions prefer a slightly acidic environment, with a pH level of approximately 6.0 to 6.8. Too alkaline? A sprinkle of elemental sulfur can nudge it down over time. Let the bed rest for a week before planting, allowing the microbes to settle in.
Starting Onions: Seeds, Sets, or Scraps?
You’ve got three ways to kick things off, each with its quirks:
- Seeds: Cheapest and most diverse, with tons of heirloom options. They take longer—up to 4 months—but you control the whole process. Sow them indoors 8-10 weeks before your last expected frost date, then transplant them outside.
- Sets: These are tiny, pre-grown bulbs, perfect for those who want a head start. Plant them directly in the ground, but watch out—some sets bolt early, going to seed instead of bulbing. Look for heat-treated organic sets to avoid this.
- Scraps: Got onion bottoms from cooking? Stick the root end in soil, and they’ll often sprout. It’s hit-or-miss but free and fun for experimenting.
For organic purity, source seeds or sets from certified growers. Kitchen scraps might carry traces of conventional farming, so use them sparingly.
Planting Onions the Organic Way
Timing matters. Plant in early spring for most regions, when the soil is workable but still cool—around 50°F (10 °C). In milder climates, fall planting works for a winter harvest. Space plants about 4 inches apart in rows 12 inches wide. Bury sets or transplants just deep enough so that the tips peek out; seeds are planted ¼ inch deep.
Here’s a tip from old farmers: plant during the waxing moon, when sap’s rising. No hard proof it works, but it’s a rhythm that feels right. Keep rows weed-free—onions dislike competition—and avoid compacting the soil by stepping on it.
Watering and Mulching for Healthy Onion Growth
Onions require steady moisture, especially during the formation of their bulbs. Aim for about an inch of water per week, less if it rains. Too much, and you’ll get rot; too little, and bulbs stay puny. Water deeply at the soil line, not overhead, to keep leaves dry and dodge fungal issues.
Mulch is your friend. Spread a 2-inch layer of straw, shredded leaves, or grass clippings (chemical-free, please) around plants. This locks in moisture, cools roots, and smothers weeds. If you’re feeling fancy, try an olla—a buried clay pot filled with water that seeps out slowly. It’s an ancient trick from desert gardeners that saves water and keeps onions happy.
Natural Pest and Disease Control for Onions
Onions aren’t pest magnets, but a few troublemakers can show up. Onion maggots (fly larvae) burrow into bulbs, ruining them. Deter them by scattering wood ash around plants or planting nearby marigolds, which repel the flies. Thrips—tiny sap-suckers—leave silvery streaks on leaves. Blast them off with a hose or spritz with diluted neem oil, a natural fix.
Fungal diseases, such as downy mildew, thrive in wet, crowded conditions. Space plants well, mulch to keep soil off leaves, and avoid watering at night. If you spot grayish patches, remove the affected plants promptly to prevent the spread of the disease. Crop rotation—don’t plant onions in the same spot next year—prevents buildup of soil-borne nasties.
Feeding Your Onions with Organic Nutrients
Onions aren’t heavy feeders, but they’ll thank you for a midseason boost. Brew a batch of compost tea: soak a shovelful of compost in a bucket of water for a few days, stirring occasionally to maintain aeration. Dilute it to the color of weak tea and pour it around the roots. Or try nettle tea—soak chopped nettle leaves for a week (it’ll stink) and dilute 1:10. Both deliver nitrogen and micronutrients without overwhelming plants.
Don’t apply fertilizer late in the season; it’ll promote leafy growth instead of bulb development. If your soil’s rich from the start, you might not need extra feeding at all.
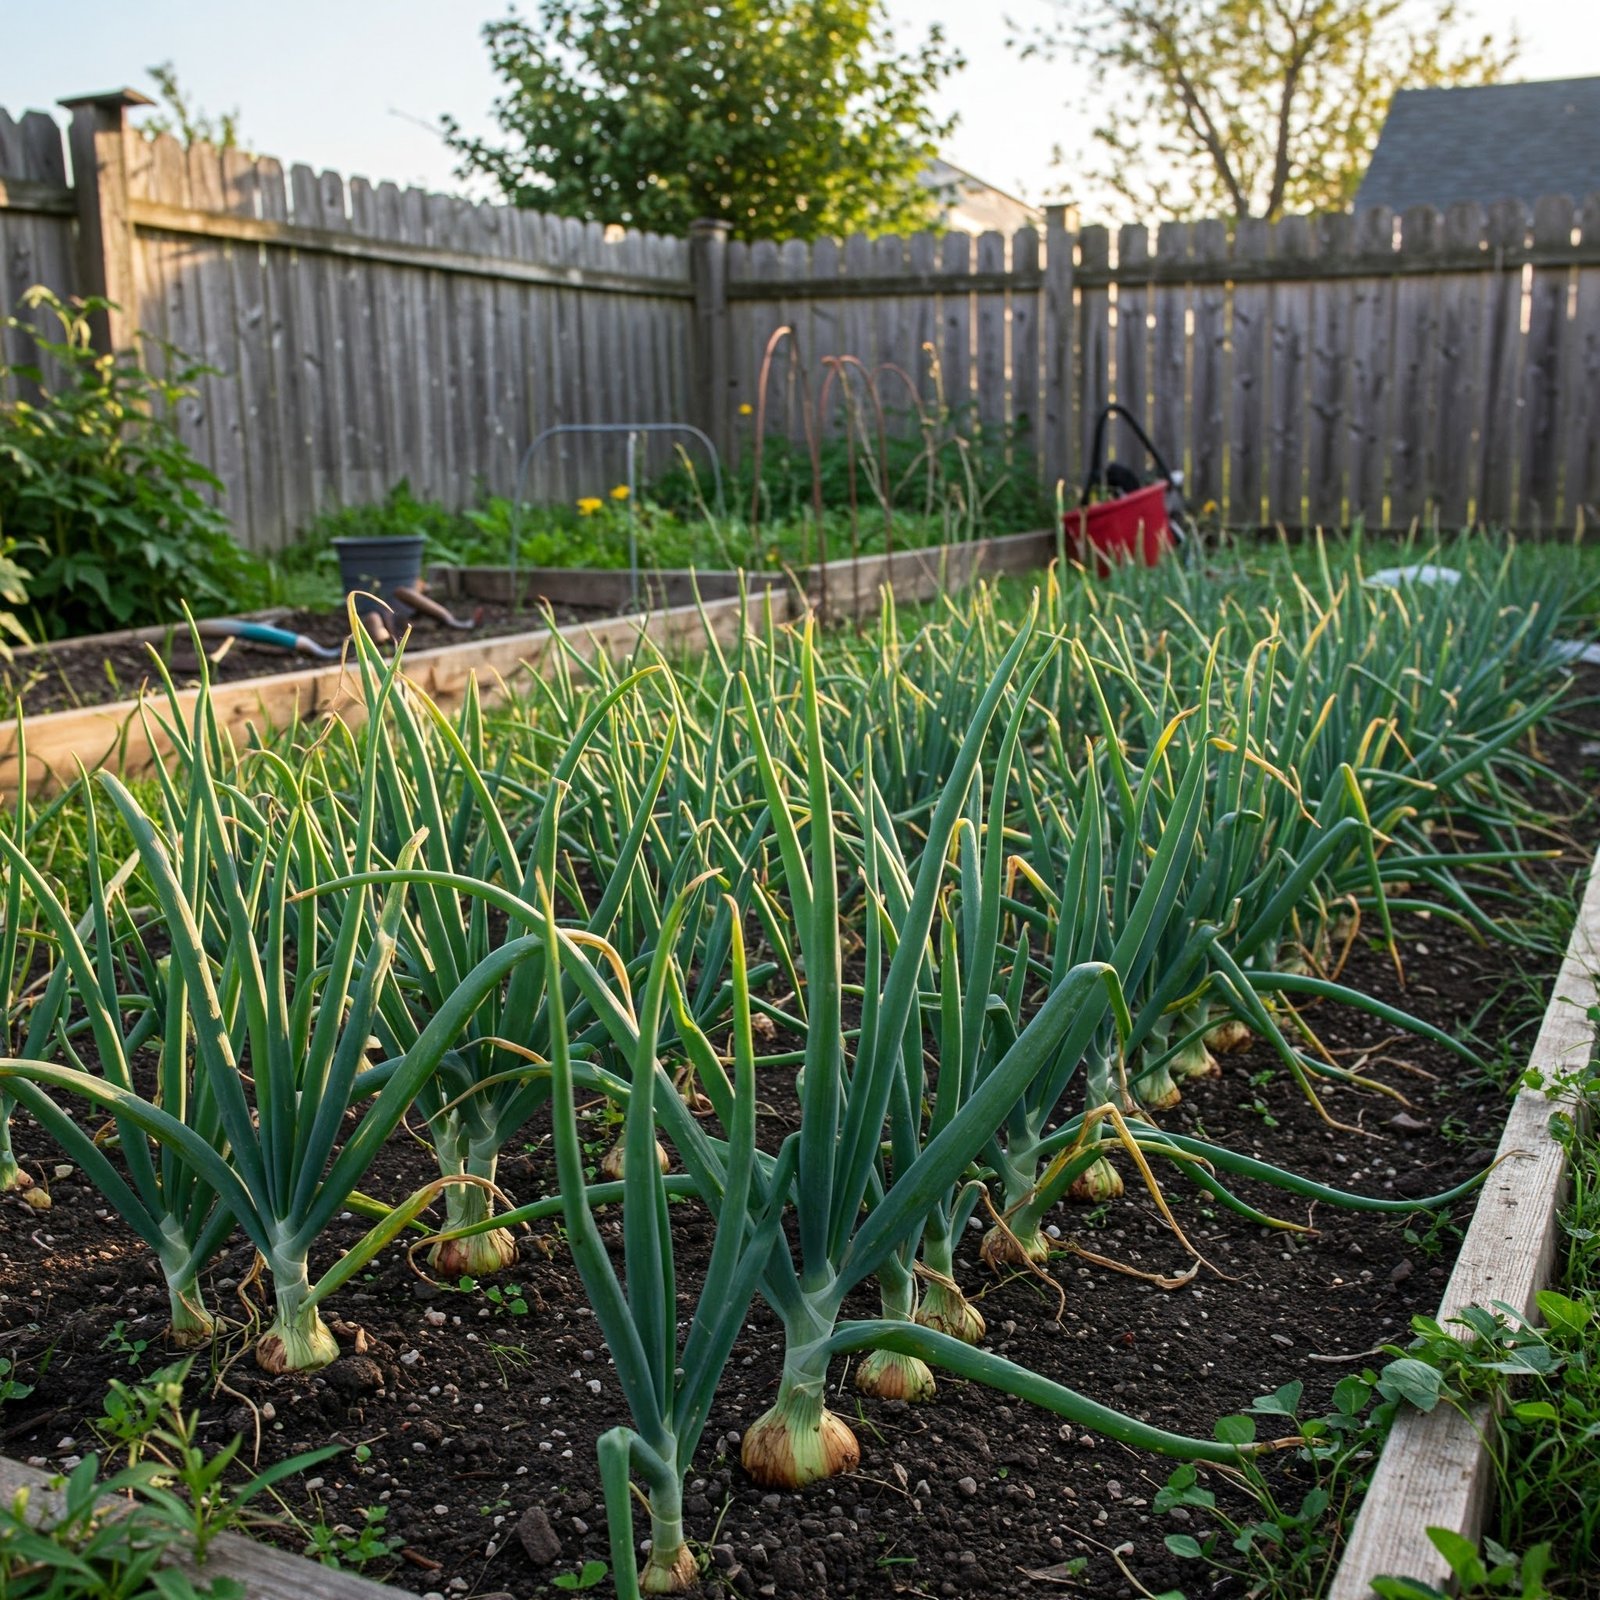
When and How to Harvest Organic Onions
Harvest time depends on the variety, but most onions are ready when the tops are yellow and flop over—usually in late summer. Don’t wait too long; bulbs can rot if left in wet soil. Gently loosen the earth with a fork, lift bulbs, and brush off dirt. Lay them in a sunny spot for a day to dry the outer skins.
Cure onions for storage by spreading them in a warm, airy place (like a garage) for 2-4 weeks. When necks are dry and skins papery, trim roots and tops to an inch. Store in mesh bags or crates in a cool, dry spot. Save smaller or damaged ones for immediate cooking. They won’t keep as long.
Saving Onion Scraps for Next Season
Why buy sets when you can grow your own? Save a few small bulbs from your harvest to replant next spring—they’ll sprout reliably. Or let a healthy onion bolt (send up a flower stalk) to collect seeds. It takes two years for seed-grown onions to produce, but it’s a free way to keep your garden going.
For a quick win, regrow scraps. Plant the root end of a kitchen onion in a pot, and you’ll get green shoots for salads, even if it doesn’t always form a whole bulb. It’s a thrifty, organic cycle.
Common Mistakes to Avoid in Organic Onion Gardening
Onions are forgiving, but a few missteps can trip you up:
- Planting too deep: Sets buried too far down rot or grow slowly. Keep tips just above the soil.
- Ignoring weeds: They steal light and nutrients. Pull them early and mulch to stay ahead.
- Overwatering: Soggy soil invites fungi. Check moisture with your finger before watering.
- Skipping rotation: Planting onions in last year’s bed builds up pests. Move them around.
Take it slow, and you’ll dodge most headaches.
Companion Planting to Boost Your Onion Crop
Onions play well with others. Plant them near carrots—their scents confuse each other’s pests, keeping carrot flies and onion maggots at bay. Chamomile or dill nearby can enhance the onion flavor and attract beneficial insects. Avoid beans or peas; they don’t pair well with onions and can hinder growth.
An old Mesoamerican trick is interplanting with low-growing plants, such as lettuce, to shade the soil and save space. Experiment, but keep records so you know what works in your yard.
Taking Care of Your Organic Onion Garden
Got issues? Here’s a quick fix list:
- Small bulbs: This could be due to overcrowding or poor soil quality. Space plants wider next time and add compost.
- Bolting (early flowering): Stress from heat or uneven water triggers this. Choose heat-tolerant varieties and keep the soil moist.
- Yellow leaves: Often normal as harvest nears, but early yellowing might mean overwatering or nitrogen deficiency. Adjust water and add compost tea.
- Pests persisting: Double down on companions or try a garlic spray (blend garlic, water, and a drop of soap).
If something’s off, dig up one plant and check the bulb—it’ll tell you more than the leaves.
Storing and Using Your Organic Onion Harvest
Properly cured onions last months. Hang braids of them in your kitchen for easy access (and rustic charm). Use sweet onions first—they spoil faster. Chop extras for freezing, or pickle them with vinegar and spices for a tangy kick.
Homegrown onions shine in simple dishes. Caramelize them low and slow for a jammy topping, or toss raw slices into salads for a crunchy texture. Knowing they’re free of pesticides makes every bite better.
Growing onions organically in your backyard isn’t just about the harvest. It’s about sinking your hands into the soil and watching life unfold. Start small, tweak as you go, and soon you’ll have bulbs to share (or hoard). Got questions about your setup? Drop them below, and I’ll help you sort it out. Happy planting!